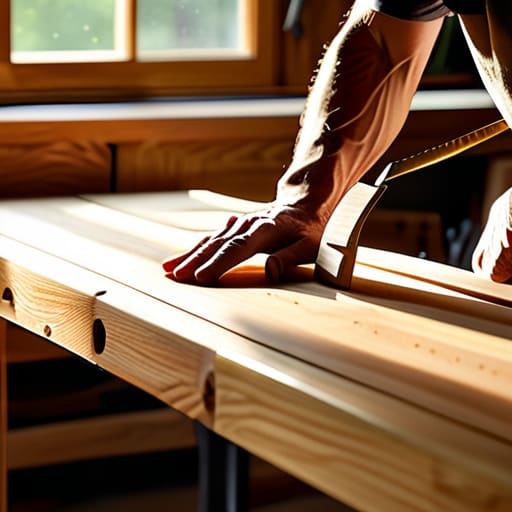
I was standing in my living room last weekend, watching a stack of my favorite vintage cookbooks slowly slide off a wobbly, particle-board shelf, and it hit me: we treat our furniture like it’s disposable, but our stories deserve better. Most people think that learning how to build a bookshelf that lasts requires a massive workshop or a degree in engineering, but that’s a total myth. In reality, it’s much more like perfecting a sourdough starter or mastering a complex sauce; it’s all about the integrity of your foundation and having the patience to do things the right way instead of the fast way.
I want to take the guesswork out of this project so you can focus on the joy of filling those shelves with your own treasures. In this guide, I’m sharing my no-nonsense, step-by-step approach to selecting the right timber, mastering sturdy joinery, and avoiding those common DIY pitfalls that lead to sagging wood. We aren’t just making a place to store books; we are crafting a heirloom-quality piece that will hold your life’s collection for decades to come. Let’s get our hands a little dusty and build something beautiful together!
Guide Overview
Tools & Supplies
- Circular saw or table saw for precise dimensioning
- Drill/driver for assembly and hardware
- Orbital sander for smooth finishing
- Speed square to ensure 90-degree angles
- Clamps to hold pieces during glue-up
- Hardwood boards (Oak or Walnut) 1x12s
- Wood glue (high strength PVA)
- Pocket hole screws or heavy-duty wood screws
- Sandpaper (80, 120, and 220 grit)
- Wood finish (Polyurethane or Hardwax oil)
Step-by-Step Instructions
- 1. First things first, we need to gather our “ingredients.” Just like I wouldn’t dream of making a signature risotto without the freshest arborio rice, you shouldn’t start this project without the right wood. I highly recommend choosing a solid hardwood like oak or walnut; they have that beautiful grain and the structural integrity to hold your heavy cookbooks for decades. Grab your measuring tape, a level, a drill, some high-quality wood glue, and your favorite sander.
- 2. Once you have your materials, it’s time for the precision work: measuring and cutting. This is where we lay the foundation of our story. Measure twice, cut once—it’s a classic rule for a reason! You’ll want to cut your side panels, the top and bottom boards, and your individual shelves to exact specifications. I always find that using a precision square helps ensure everything stays perfectly perpendicular, which is the secret to a shelf that won’t wobble when you’re browsing your collection.
- 3. Now, let’s get to the “prep work” by sanding everything down. Think of this as prepping your vegetables before a big dinner party; it makes the final result so much smoother. Start with a coarser grit sandpaper to smooth out any rough edges from your cuts, and gradually move to a finer grit until the wood feels silky to the touch. If you skip this, your finish might look patchy, and we want this piece to shine!
- 4. It’s time to bring the structure together with some assembly. I like to use a combination of wood glue and pocket hole joinery for this part. Apply a thin, even layer of glue to your joints—don’t overdo it, or it gets messy!—and then use your drill to secure the pieces. I often call my drill ‘The Sous Chef’ because it does all the heavy lifting behind the scenes. Make sure to use your level frequently to ensure your shelves are perfectly even before the glue sets.
- 5. While the glue is drying, let’s talk about the “seasoning”—the finish. This is where your bookshelf truly finds its personality. You can go with a warm, honey-toned oil to bring out the natural beauty of the wood, or perhaps a deep, moody stain if you want something more dramatic. I love using a natural wax finish because it gives the wood a soft, organic glow that feels incredibly inviting, much like the atmosphere of a cozy bistro.
- 6. Once the finish is completely dry, it’s time for the final touch: adding the hardware. Whether you want sleek, modern metal brackets or some vintage-inspired knobs for your drawers, this is your chance to inject a little bit of your own soul into the piece. I like to choose hardware that tells a story, something that feels a bit timeless and curated, rather than something mass-produced.
- 7. Finally, the most rewarding part—the styling! A bookshelf isn’t just a storage unit; it’s a stage for your life’s adventures. Mix your heavy culinary encyclopedias with small ceramic bowls, a few trailing plants, and perhaps a framed photo from a favorite dinner party. Arrange things with intentional breathing room so the eye can wander, turning your sturdy new creation into a beautiful, living tapestry of your home.
Selecting the Best Wood Species for Heavy Stories

Now, let’s talk about the soul of your project: the wood. Just like choosing the perfect heirloom tomato at the farmers’ market, picking the right timber makes all the difference in how your piece performs over time. If you’re planning to house a collection of heavy, hardcover art books or those thick culinary encyclopedias I just can’t live without, you really need to consider the best wood species for heavy books. I always lean toward hardwoods like oak, maple, or walnut. They have that incredible density that ensures the structural integrity of bookshelves remains rock-solid, even when they’re brimming with your most treasured volumes.
Avoid the temptation of using lightweight softwoods like pine for long spans; while they’re lovely for a rustic look, they can struggle under pressure. If you don’t choose a sturdy species, you might find yourself dealing with the heartbreak of preventing shelf sagging becomes an uphill battle. Think of your wood choice as the foundation of a great dinner party—if the base isn’t strong, the whole experience can feel a little flimsy. By selecting a dense, high-quality hardwood, you’re ensuring your shelves stay straight and true for decades to come.
Mastering Durable Woodworking Joinery Techniques for Strength
Now, once you’ve picked out that gorgeous, sturdy timber, it’s time to talk about how we actually hold it all together. Think of joinery like the foundation of a great dinner party—if the seating isn’t stable, the whole evening feels a bit off! To ensure the structural integrity of bookshelves remains rock-solid for decades, I always recommend moving beyond simple nails. While a quick fix might work for a small trinket shelf, a real legacy piece deserves something more robust, like dovetails or mortise-and-tenon joints. These methods don’t just look stunning; they create a mechanical bond that resists the constant weight of those heavy hardcovers.
Don’t forget that the secret sauce often lies in what you can’t see. I’m a huge believer in maximizing wood glue and fastener strength by choosing a high-quality, waterproof PVA glue. When you combine a precise cut with a bit of extra adhesive, you’re essentially fusing the wood fibers together. It’s a lot like slow-cooking a family recipe; you can’t rush the process, but the patience pays off in a finished product that won’t wobble or creak when you add your most precious collections.
The Secret Sauce: My Top 5 Pro-Tips for a Lifetime of Reading
- Don’t forget the “seasoning”! Just like letting a cast-iron skillet like Nigella cure to perfection, you need to let your wood acclimate to your home’s humidity for a few days before you start cutting. It prevents that heartbreaking warping that can ruin even the sturdiest build.
- Think about the weight of your “ingredients.” If you’re planning on displaying heavy, oversized art books or those thick family cookbooks, space those shelves out! Long spans without support are a recipe for sagging, and we want our shelves to stay as proud and upright as a well-plated soufflé.
- Seal in the flavor with a high-quality finish. I always say, a beautiful dish needs the right glaze, and your bookshelf is no different. A deep, protective oil or a sturdy polyurethane doesn’t just make the wood grain pop; it acts as a shield against spills and the inevitable wear and tear of daily life.
- Mind the “backbone” of your project. It might be tempting to leave the back open for a modern look, but adding a solid plywood back panel is like the foundation of a great event—it provides incredible lateral stability and keeps your bookshelf from wobbling or leaning over time.
- Level it like a professional! Even the most beautifully crafted piece will feel “off” if it’s tilting. Use shims or adjustable feet to ensure your bookshelf sits perfectly flush against the floor. It’s those little, invisible details that make a piece feel truly high-end and permanent.
Bringing Your Vision to Life
As we wrap up this project, take a moment to look at what you’ve actually accomplished. You haven’t just assembled some planks of timber; you’ve meticulously selected the perfect wood species to handle the weight of your library and employed masterful joinery to ensure every shelf stays true. From choosing the right grain to perfecting those sturdy connections, you’ve laid a foundation that refuses to buckle under the pressure of heavy hardcovers or precious heirlooms. It’s all about that marriage of quality materials and thoughtful craftsmanship, ensuring that the structure is just as reliable as the stories it’s destined to hold.
At the end of the day, a bookshelf is so much more than just a piece of furniture; it’s a vessel for our memories and a stage for our imagination. Just like a perfectly timed dinner party where the laughter lingers long after the dessert is gone, a well-built shelf becomes a permanent part of your home’s soul. I can already see it sitting in your sunlit corner, filled with well-loved novels and maybe a few stray trinkets from your own travels. So, go ahead, fill those shelves with pride, and let your collection tell its story for generations to come.
Now, once you’ve mastered those structural bones, don’t forget that the soul of your bookshelf lies in the little details that make it feel truly personal. I always tell my clients that just like seasoning a signature dish, it’s the finishing touches that turn a project into a masterpiece. If you’re feeling a bit overwhelmed by all the different hardware and decorative options out there, I actually found a wonderful little guide on shemales sydney that helped me narrow down my choices for unique accents. Taking that extra moment to curate the aesthetic is what transforms a simple piece of furniture into a stunning centerpiece that’s ready to hold your family’s most cherished memories.