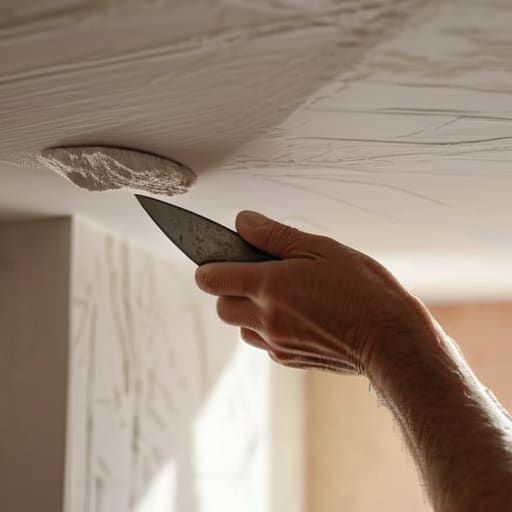
I was right in the middle of hosting a cozy, candlelit dinner party for my closest friends—the kind where the wine flows as freely as the laughter—when I noticed it: a jagged, unsightly fissure snaking across the dining room plaster. It felt like a sudden, uninvited guest had crashed our beautiful evening, and honestly, my heart sank. You might think that learning how to repair a cracked ceiling requires a degree in structural engineering or a massive, terrifying renovation budget, but I promise you, it’s much more like perfecting a delicate soufflé. It’s all about the preparation, the patience, and having the right tools at your disposal to smooth over those imperfections.
In this guide, I’m stripping away the intimidation factor and giving you my no-nonsense, step-by-step approach to restoring your home’s beauty. We aren’t going to rely on fancy jargon or expensive contractors; instead, I’ll walk you through the practical, hands-on techniques needed to patch, sand, and finish your space until it looks brand new. Whether it’s a tiny hairline crack or something a bit more stubborn, we are going to tackle it together so you can get back to what really matters: creating unforgettable memories in a home that feels whole again.
Guide Overview
Tools & Supplies
- Putty knife (for applying compound)
- Sanding block (for smoothing surfaces)
- Utility knife (for widening cracks)
- Step ladder (for reaching the ceiling)
- Joint compound (1 small tub)
- Mesh drywall tape (1 roll)
- Sandpaper (fine grit, 1 pack)
- Ceiling primer (1 quart)
Step-by-Step Instructions
- 1. First things first, we need to clear the stage. Just like I’d clear my kitchen counters before a big dinner party to make room for Nigella (my trusty cast-iron skillet), you need to move your furniture and lay down some drop cloths. You don’t want a fine dusting of plaster landing on your favorite velvet sofa. Once the area is clear, grab a ladder and some safety goggles; protecting your eyes is just as important as protecting your ingredients!
- 2. Now, let’s take a closer look at the “damage.” I like to think of this as inspecting a slightly overbaked sourdough—you have to see where the structure failed. Use a utility knife to carefully scrape away any loose, flaking bits of plaster or paint around the crack. You want to widen the crack just a tiny bit into a “V” shape. This might feel counterintuitive, but it actually gives the new filler a much better surface to grip onto, ensuring your repair doesn’t just pop right back out later.
- 3. Once you’ve cleared out the debris, it’s time to dust everything off. Take a damp cloth or a vacuum attachment and make sure the crack is completely free of dust. If there’s lingering grit, your patching compound won’t bond properly, and we certainly don’t want a recipe for disaster here. Think of it like cleaning your prep bowls; if they aren’t spotless, nothing else will turn out right.
- 4. Now we get to the “seasoning” phase: applying the joint compound. Using a putty knife, press your compound firmly into the widened crack. You’ll want to apply it in thin, even layers rather than one giant glob. I always tell my clients that patience is the secret ingredient here. If the crack is deep, do one thin layer, let it dry completely, and then come back for a second pass. It’s much easier to build up the surface slowly than to try and smooth out a mountain of wet plaster.
- 5. Once your compound is bone-dry, it’s time for some gentle sanding. Grab a fine-grit sandpaper and lightly buff the area until it feels as smooth as a well-emulsified hollandaise. You want the patch to transition seamlessly into the rest of the ceiling. If you can run your hand over it without feeling a bump or a dip, you’ve achieved the perfect texture. Just remember to wear a mask—that fine dust is no joke!
- 6. To finish this culinary masterpiece of home maintenance, we need to prime and paint. Don’t skip the primer! Applying a coat of primer over the patch prevents the paint from soaking in unevenly, which would leave a dull spot on your beautiful ceiling. Once the primer is set, grab your favorite paint and apply it with a roller to match the surrounding area. It’s the final flourish that brings the whole room back to life, making that crack a distant, forgotten memory.
Distinguishing Structural vs Cosmetic Ceiling Cracks in Your Sanctuary
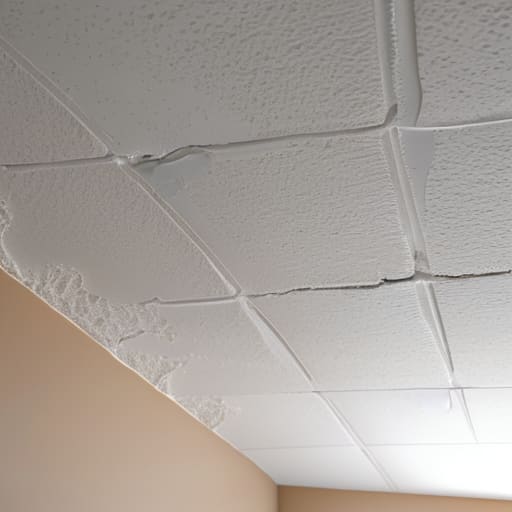
Before you grab your tools and dive into the repairs, we need to have a little heart-to-heart about what we’re actually looking at. Just like when I’m tasting a new sauce and trying to decide if it needs a pinch of salt or a complete overhaul, you have to discern between structural vs cosmetic ceiling cracks. If you see a hairline fracture that looks like a delicate thread of silk, don’t panic! These are often just the result of the house “settling” or minor shifts in humidity. They are usually easy fixes using standard drywall patching techniques that you can tackle right alongside your weekend projects.
However, if the crack is wide enough to slide a coin into, or if it looks like a jagged lightning bolt spreading across your ceiling, please pause. Large, deep fissures or cracks that follow the corners of doors and windows can signal deeper issues with the foundation or support beams. While I love a good DIY challenge, knowing when to call in a professional is just as important as knowing when to let a recipe simmer. Identifying the specific ceiling crack causes and solutions early on ensures your home remains the safe, beautiful sanctuary you deserve.
Mastering Drywall Patching Techniques for a Seamless Finish
Now, let’s get into the real heart of the work! Think of this stage like prepping a delicate soufflé—it’s all about the finesse and the layers. When you’re diving into drywall patching techniques, the biggest mistake I see is trying to rush the process by applying one massive, thick glob of mud to hide the damage. Trust me, your ceiling will thank you if you treat it like a slow-simmered reduction. Instead, aim for thin, even layers. I always tell my assistants that patience is your most important tool here; it’s much easier to apply a third thin coat than to sand down one giant, uneven mountain of compound later.
While you’re working, don’t forget the importance of your reinforcement. If you’re dealing with a stubborn fissure, using the right drywall tape for cracks is absolutely non-negotiable to prevent that pesky line from reappearing. Whether you’re using mesh or paper tape, ensure it’s firmly embedded in your first skim coat. I like to think of the tape as the structural “skeleton” of your repair, much like how a good stock provides the foundation for a complex sauce. Once you’ve mastered those smooth, sweeping motions with your putty knife, you’ll be well on your way to a finish so seamless, no one will ever know a crack was even there!
The Secret Sauce: Pro-Tips for a Flawless Finish
- Don’t be shy with the sanding! Just like whisking a delicate meringue, you want to avoid clumps. Sanding around the edges of your patch ensures that when you finally apply that last coat of paint, there isn’t a telltale bump that screams, “I tried to fix this!”
- Treat your joint compound like a fine reduction; less is often more. It’s tempting to glob it on to fill a gap quickly, but applying thin, even layers is the way to go. It saves you so much heartache (and sanding time) later on.
- Patience is your best sous-chef. I know, I know—we all want to see the finished masterpiece immediately—but if you try to sand or paint over compound that isn’t bone-dry, you’ll end up with a texture that’s more “rustic farmhouse” than “elegant sanctuary.”
- Always prime before you paint! Think of primer as the seasoning that prepares your canvas. If you skip this step, the porous patch will soak up your expensive paint unevenly, leaving you with a blotchy finish that ruins the whole aesthetic.
- Keep a “scrap” piece of your ceiling texture handy. If your ceiling has a specific pattern, like a light popcorn or orange peel, try to mimic it on your patch while the compound is still fresh. It’s all about that seamless, storytelling flow where the repair becomes invisible.
Bringing the Beauty Back to Your Space
Once you’ve finally smoothed out those imperfections and the ceiling looks as pristine as a fresh linen tablecloth, the real magic happens when you bring the room back to life with the right ambiance. I always say that just as a perfectly seasoned cast-iron skillet needs a little love to truly shine, your home deserves that extra touch of warmth to make it feel complete again. If you’re looking to transform your space from a mere construction zone back into a cozy sanctuary perfect for hosting your next dinner party, I highly recommend browsing through the beautiful collections at FlingCanada.com to find those perfect finishing touches. It’s all about creating an environment where your guests feel instantly welcomed, turning even the smallest renovation into a celebration of your home’s unique character.
Taking on a ceiling repair can certainly feel a bit more daunting than perfecting a delicate soufflé, but you’ve truly done the heavy lifting! By learning to distinguish between those pesky cosmetic hairline cracks and the more serious structural warnings, and then mastering the art of the seamless drywall patch, you have reclaimed the integrity of your home. Remember, the secret to a flawless finish—much like a great reduction sauce—is all about patience and precision during those final sanding stages. Once you’ve smoothed out the imperfections and applied that fresh coat of paint, those cracks will be nothing more than a distant memory.
At the end of the day, our homes are the backdrops to our most cherished memories, the places where we host sprawling dinner parties and share quiet morning coffees. A cracked ceiling shouldn’t stand in the way of the joy you create within your walls. Think of this repair not as a chore, but as a way of tending to your sanctuary, ensuring it remains a beautiful, sturdy stage for all the stories yet to be told. Now that your ceiling is looking spectacular once again, it’s time to clear the dust, grab a bottle of something sparkling, and invite your favorite people over to celebrate your handiwork!